I wanted to share this with people as I think it is a fantastic post and is a great read for any mobile Developers / Marketers. It is written by Jason Weaver & Luke Wroblewski. Enjoy.
As more diverse devices embrace touch as a primary input method, it may be time to revisit navigation standards on the Web. How can a navigation menu be designed to work across a wide range of touch screen sizes?
The Demos
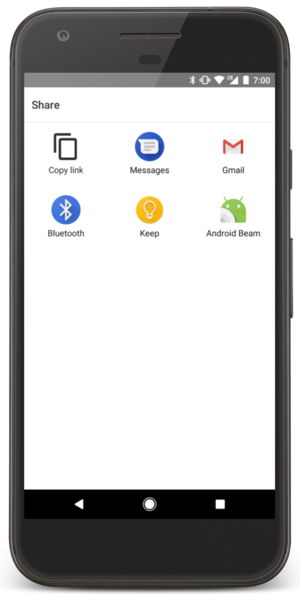
- Split Screen Navigation
- Multi-Level Bottom Navigation
- Variation: Split Screen Navigation with a background
- Variation: Single Row
Why do these navigation menus work across a wide range of touch screen sizes? Why do we care about touch across a wide range of screen sizes? Read on...
Across Screen Sizes
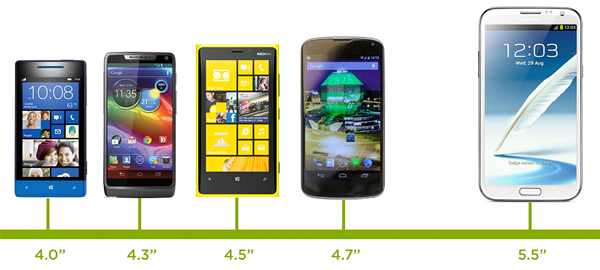
First, why do we care about touch across a wide range of screen sizes? Isn't touch just used on mobile devices and tablets? While it's true touch interfaces are increasingly present on small screen sizes, there's a lot of diversity even in this class of devices. Consider in the past two months smartphones ranging from 3.5" to 5.5" have been released by major manufacturers.
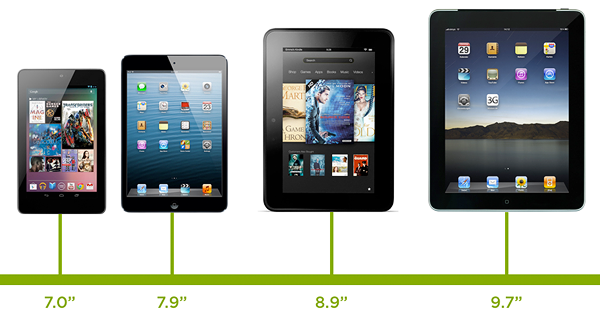
Tablets are no different. Again in the past two months alone we've seen tablets released with 7" screens, 10.1" screens, and everything in between.
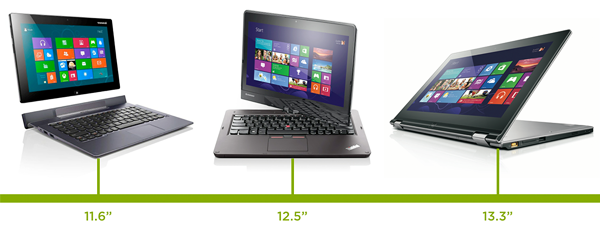
And the very notion of what defines a tablet is being challenged by laptop/tablet convertibles and touch-enabled Ultrabooks. These devices range from 11.6" to 13.3" inch screens and treat touch as a primary input method. In fact, early testing by Intel found that touch was even a preferred input method on touch enabled laptops.
Even beyond 13 inches, touch and gesture interfaces are possible. Consider Sony's 20" VAIO Tapor the use of a gesture interface like Leap Motion on any sized-screen and really quickly you realize touch is an input model to consider across all screen sizes.
Accounting For Touch
So what does it mean to consider touch across all screen sizes? Two things: touch target sizesand placement of controls. Any navigation system that needs to work with touch needs to have menu options that can be comfortably used with imprecise fingers. It also needs to be positioned in a way that aligns with how people hold and use touch-enabled devices.
Touch target sizes are relatively easy: just make things big enough to prevent accidental taps and errors. Your reaction to this may be "but I have so many things to fit in my app. How can I do that if the touch targets have to be so big?" frankly you can't and quite often that's a good thing.
Designing towards touch really forces us to simplify and decide what's most important- what needs to stay on the screen. If we go through that exercise we ultimately end up with software that's easier to understand and as a result more often used. Both good things. And while big touch targets can be comfortably used with a mouse (in fact they'll be easier to hit with a mouse), small mouse size targets can't be used easily with touch. So when in doubt, optimizing for touch will make sure things are usable for both mouse and touch users.
But accounting for touch isn't just about the size of controls, the placement of controls is important as well. To understand why this matters, let's look at how people hold a smartphone. In each of these examples, the bias is toward right handed use as most people in the world are right handed.
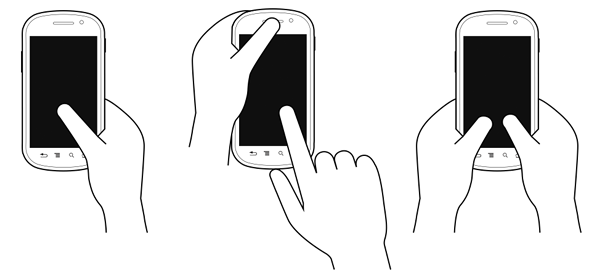
These common patterns of posture create easy to hit and hard to reach touch areas. The area toward the bottom of the screen is easy, whereas the upper corners are a bit of stretch. So the bottom area of a smartphone screen is where we want to put an application's most common and important interactions. Where they can be reached quickly and easily.

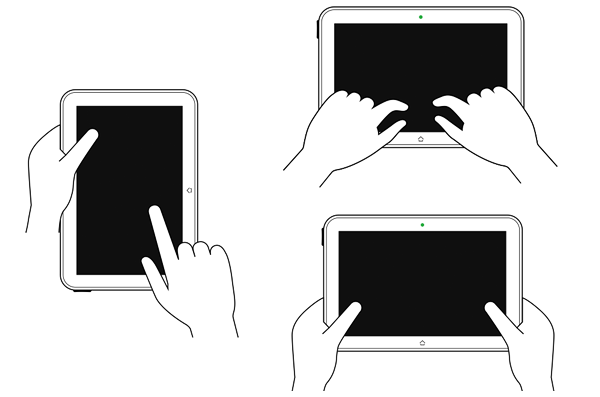
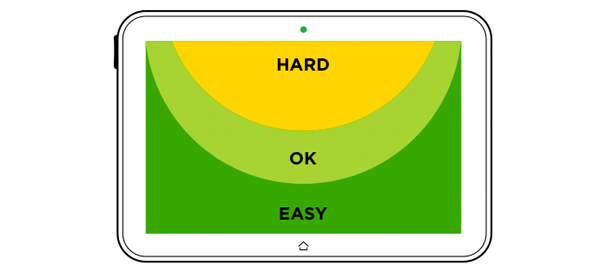
Similarly we can look at tablet postures or how people typically hold tablet computers. That is two hands along the sides, or typing over the screen in their lap. In the landscape postures we see a different series of easy, ok, and hard to hit touch areas.
With touch-enabled laptops, people get pretty close to the screen and use their two thumbs to tap which yields easy to hit areas in the bottom corner of the screen.
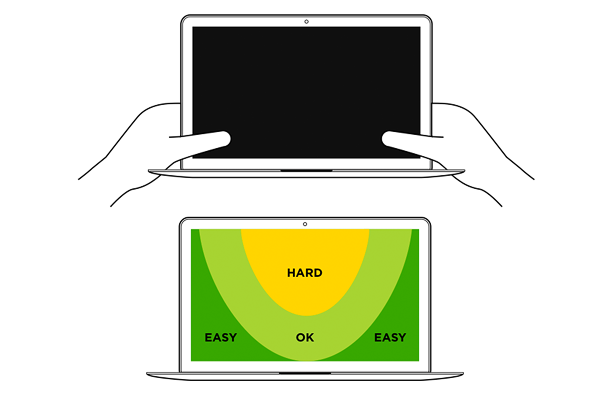
As you've hopefully observed the common pattern here is comfortable touch surfaces toward the bottom of the screen. Looking at the ergonomics of use across devices types pushes us toward the bottom, which is where we'd ideally like to place important functionality like navigation controls.
An Adaptive Solution
Today, most Web navigation systems are designed for a mouse and keyboard world. They're placed prominently across the top of the screen or along the sides. In other words, everywhere but in easy to touch areas.
In our earlier multi-device designs, we accounted for this convention by creating a series of navigation structures that adapted from comfortable touch zones on small screen devices to the kinds of navigation structures people have come to expect on desktop and laptop computers (top of screen, etc.). You can see a number of these explorations in Off Canvas Multi-Device Layouts.
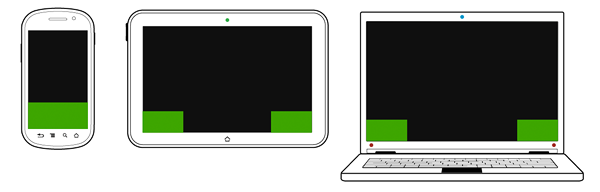
But given how things are changing and touch is permeating nearly every sized screen, it may be time to revisit that structure. Specifically, rather than optimizing for touch only on small screens, optimizing for it on all screens. That means big touch targets and bottom positioning throughout.
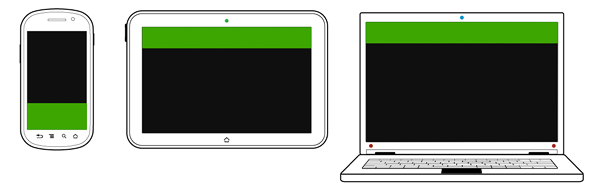
Of course we still have to account for varying screen widths, so our navigation controls will have to change as more space becomes available. To account for this, we decided to shift from a single row navigation structure on small screens to a split row model on larger screen sizes.
You can see this technique in action in the sample pages below:
- Split Screen Navigation
- Multi-Level Bottom Navigation
- Variation: Split Screen Navigation with a background
- Variation: Single Row
Whether or not this multi-device navigation structure is the best answer for an increasingly touch-enabled computing world remains to be seen. However, rethinking our existing conventions is exactly the kind of thing we should be doing during the kind of fundamental changes we are seeing today. New input methods and devices are challenging our long-standing assumptions and that's a good thing for Web design.
Thanks to Jason Weaver for bringing these ideas to life! Check out some of our other multi-device collaborations in: