Following on from yesterday’s post about adding a text function to your app, this time is how to make a simple phone call application. Is that important? Yes, It is. Imagine, you're in danger, and you don't know what to do. So, what should you do? Call emergency number? Do you remember that number? Or, if you get accident, can you type the number correctly? It's a simple task. But it'll be easier and simpler if you can call a number with one touch. Let's see how to do that.
Create a new android project. First thing we should do is to add user permission in AndroidManifest.xml file so we can make a phone call using our app. See the highlighted code below:
<?xml version="1.0" encoding="utf-8"?>
<manifest xmlns:android="http://schemas.android.com/apk/res/android"
package="com.blogspot.juniantr.phonecallsample" android:versionCode="1"
android:versionName="1.0">
<application android:icon="@drawable/icon" android:label="@string/app_name"
android:debuggable="true">
<activity android:name=".PhoneCallSampleAct" android:label="@string/app_name">
<intent-filter>
<action android:name="android.intent.action.MAIN" />
<category android:name="android.intent.category.LAUNCHER" />
</intent-filter>
</activity>
</application>
<uses-permission android:name="android.permission.CALL_PHONE" />
</manifest>
Next, open the main.xml file and we'll change the user
<?xml version="1.0" encoding="utf-8"?>
<LinearLayout xmlns:android="http://schemas.android.com/apk/res/android"
android:orientation="vertical" android:layout_width="fill_parent"
android:layout_height="fill_parent">
<Button android:layout_height="wrap_content" android:text="@string/call"
android:layout_width="wrap_content" android:id="@+id/btnCall"></Button>
</LinearLayout>
Open your activity java file (in my project, it's PhoneCallSampleAct.java) and add this code:
private void phoneCall()
{
String phoneCallUri = "tel:911";
Intent phoneCallIntent = new Intent(Intent.ACTION_CALL);
phoneCallIntent.setData(Uri.parse(phoneCallUri));
startActivity(phoneCallIntent);
}
Finally, let's add the last touch so the app can running. Our scenario is simple. We just need press the button and it'll call 911. Here is the complete code:
package com.blogspot.juniantr.phonecallsample;
import android.app.Activity;
import android.content.Intent;
import android.net.Uri;
import android.os.Bundle;
import android.view.View;
import android.view.View.OnClickListener;
public class PhoneCallSampleAct extends Activity implements OnClickListener{
/** Called when the activity is first created. */
@Override
public void onCreate(Bundle savedInstanceState) {
super.onCreate(savedInstanceState);
setContentView(R.layout.main);
View callButton = findViewById(R.id.btnCall);
callButton.setOnClickListener(this);
}
private void phoneCall()
{
String phoneCallUri = "tel:911";
Intent phoneCallIntent = new Intent(Intent.ACTION_CALL);
phoneCallIntent.setData(Uri.parse(phoneCallUri));
startActivity(phoneCallIntent);
}
@Override
public void onClick(View v) {
// TODO Auto-generated method stub
switch(v.getId())
{
case R.id.btnCall:
phoneCall();
break;
default:
break;
}
}
}
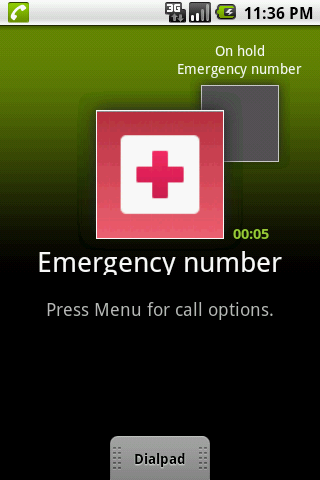
Here is a running sample: